Assign Reserved Seats to Registered Attendees
Overview
Hosting an event with a seating chart allows organizers to offer assigned seating and better control over attendee arrangements. In some cases, organizers may prefer to assign seats manually from the admin side instead of letting attendees select them during registration. This gives the organizer complete control over seat allocation and ensures a smoother event setup.
Organizers can also choose to hide the seating chart from the attendee view if they wish to manage all seat assignments internally.
Hidden seating charts allow full admin control over allocations, ensuring no attendee-side seat selection.
👉 Learn more about hiding seating charts
How to View and Assign Seat IDs for Confirmed Orders
Follow the steps below to assign or update seat IDs for attendees who have confirmed registrations.
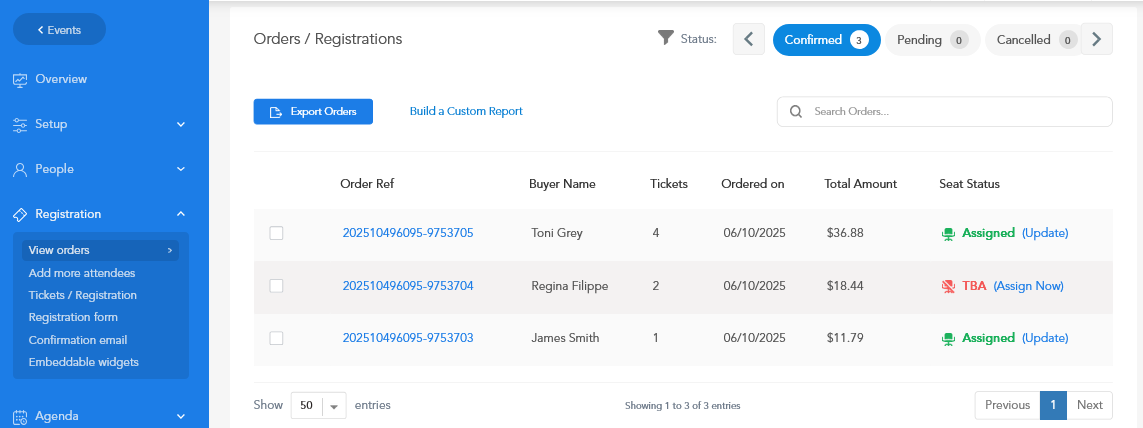
Navigate to Confirmed Orders
- Go to Registration > View Orders from your event admin panel.
- Locate the order with Confirmed status.
The Assign Seat ID option is available only for confirmed orders.
Check Seat Assignment Status
- Each confirmed order will display the Seat Status.
- If it shows TBA (To Be Assigned), it means the attendee hasn’t been allocated a seat yet.
- Click Assign Now to begin assigning a seat.
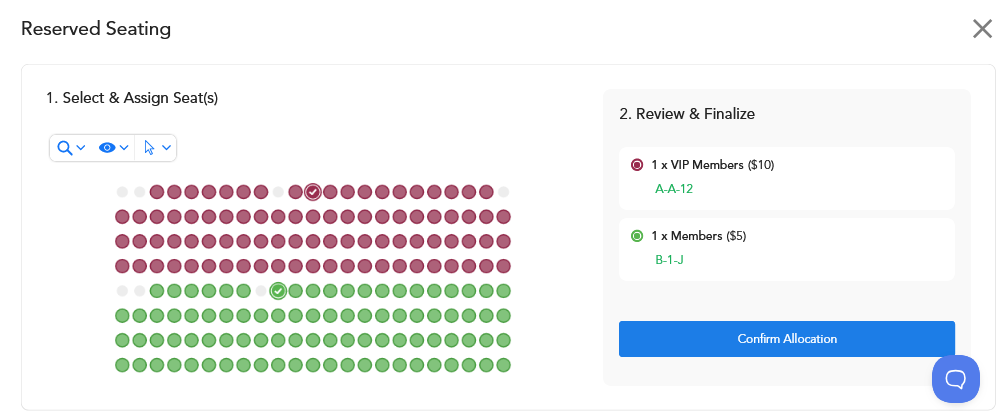
Assign the Seat
Once you click Assign Now, the seating chart view will appear.
- Select the seat ID you want to assign to the attendee.
- Review & Finalize - Select Confirm Allocation to save the seat assignment.
Once confirmed, the attendee will receive an email confirmation with their updated seat details.
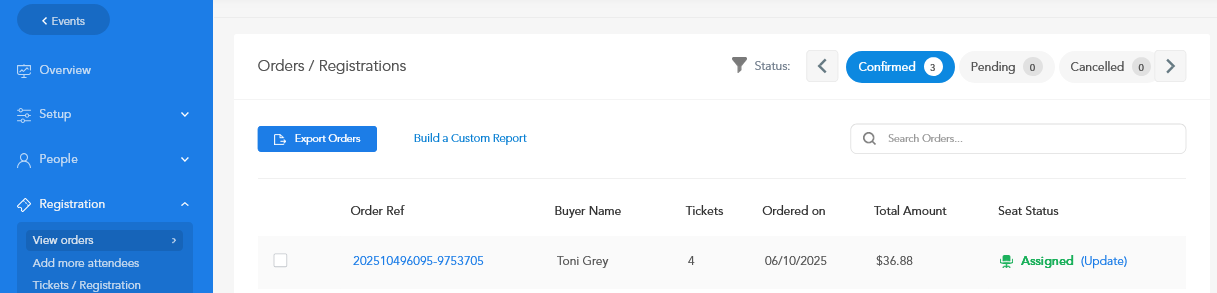
Updating Seat Assignments
You can also use this option to update or change seat IDs for an existing order.
- If a seat is already assigned, you’ll see the Update button next to the order.
- Click Update to open the seating chart and select a new seat.
- Confirm your selection and finalize the update.
- The attendee will automatically receive a notification email with the revised seat information.
Assigning Seats Across Multiple Ticket Categories
You can assign or update seat IDs for multiple ticket categories in the event. However, it’s important to note that each ticket category is directly linked to its own set of seat IDs.
This means:
- A seat ID can only be assigned within its corresponding ticket category. For example, seats designated for VIP tickets cannot be assigned to General Admission or other categories.
- The number of seat IDs assigned must match the number of tickets purchased under that specific category. Seat selections cannot exceed or overlap the total tickets registered for the specified category.
If the event includes multiple ticket categories, and an order is registered under one specific category, the seat assignment view will automatically display only the seats available for that particular category.
Attendees automatically receive an updated confirmation email once a seat is assigned or changed.
For any additional questions, please write to help@eventzilla.net