
Set up Eventzilla Webinar (powered by Joinlive)
Eventzilla Webinar is powered by Joinlive, providing an integrated webinar experience without requiring a separate account or sign-in.
When you select Eventzilla Webinar as your webinar provider and save the hosting settings, a webinar room is automatically created for you.
You can then enter the webinar room, invite presenters, and manage features such as Chat and Q&A directly from Eventzilla.
For advanced webinar capabilities, you can open the webinar in Joinlive and customize additional settings.
Select Eventzilla Webinar
To set up an Eventzilla Webinar:
- Open your event and go to the webinar configuration settings.
- Select Eventzilla Webinar as the webinar provider.
- Complete the required webinar settings.
-
Click Save Settings.
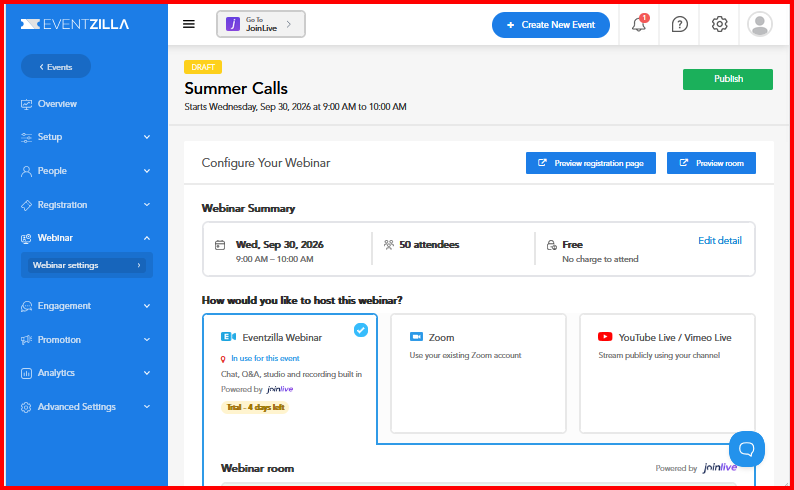
A webinar room is automatically created when you save these settings.
Once the room is created, you can enter the room, invite presenters, and manage the available engagement features.
Eventzilla Webinar and Joinlive use the same sign-in. You do not need to create or manage a separate Joinlive account.
Eventzilla vs. Joinlive: What Can You Configure?
Eventzilla provides the essential webinar setup and commonly used attendee features, while Joinlive provides additional customization and advanced webinar capabilities.
| Configure in Eventzilla | Customize in Joinlive |
|---|---|
| Webinar provider | Polls |
| Webinar room | Handouts |
| Presenters | Offers & CTAs |
| Chat | Surveys |
| Q&A | Recurring webinars |
| Session reminders | Advanced reminder customization |
| Recording & Replay | Evergreen webinars |
|
|
Automated webinars |
|
|
Simulive live stream |
|
|
Studio and production |
|
|
Advanced analytics |
Webinar Room
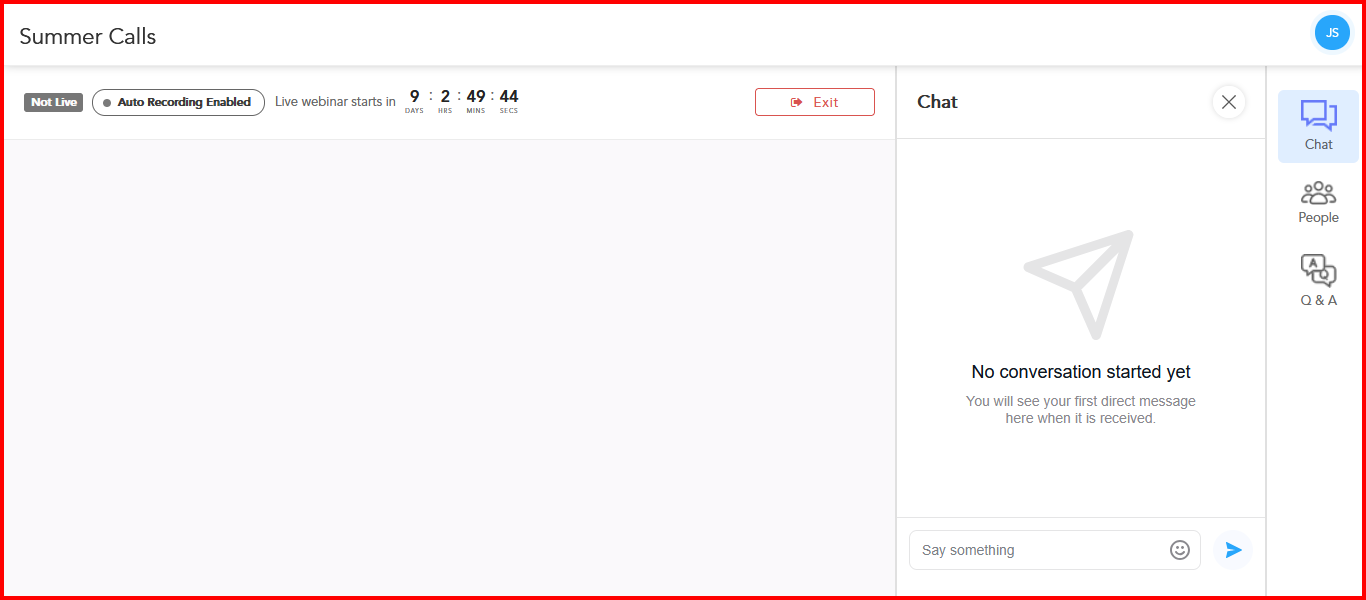
After you save the Eventzilla Webinar settings, the webinar room is created automatically.
From the webinar room, you can:
- Enter and run the webinar
- Invite presenters
- Communicate with attendees through Chat
- Manage Q&A
- Conduct the live webinar
When you need more advanced capabilities, you can expand the setup in Joinlive.
Presenters
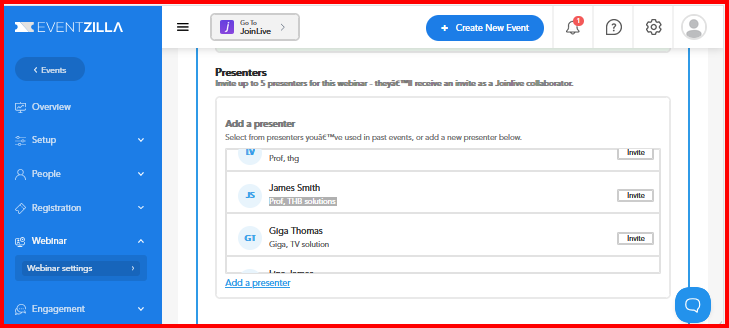
You can invite up to 5 presenters for each webinar.
Each presenter receives an invitation to join as a Joinlive collaborator.
Add a presenter
- Go to the Presenters section.
- Click Add a presenter.
- Select a presenter you have used in a previous event, or add a new presenter.
- Send the invitation.
Invited presenters can then participate in the webinar according to their assigned access.
Engagement Tools
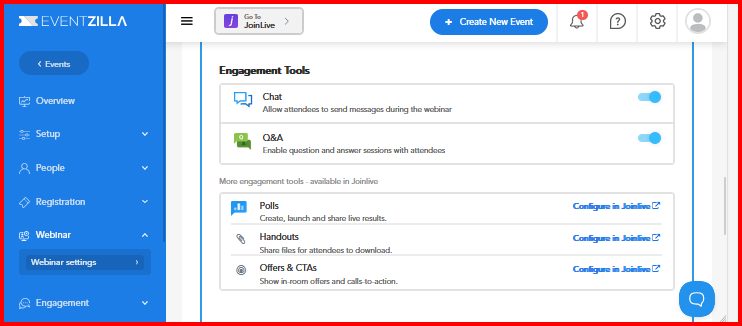
Eventzilla provides simple engagement tools that you can enable directly from the webinar settings.
Chat
Enable Chat to allow attendees to send messages during the webinar.
Chat can be used for general attendee interaction, comments, and discussions during the live session.
Q&A
Enable Q&A to allow attendees to submit questions during the webinar.
This is useful when presenters want to manage attendee questions separately from general chat.
More Engagement Tools in Joinlive
For richer audience engagement, open the webinar in Joinlive.
Polls
Create and launch polls during the webinar and share live results with attendees.
Handouts
Share files and resources that attendees can download during the webinar.
Offers & CTAs
Display offers and calls-to-action during the webinar to encourage attendees to take a specific action.
Joinlive also provides additional engagement capabilities such as surveys and reactions.
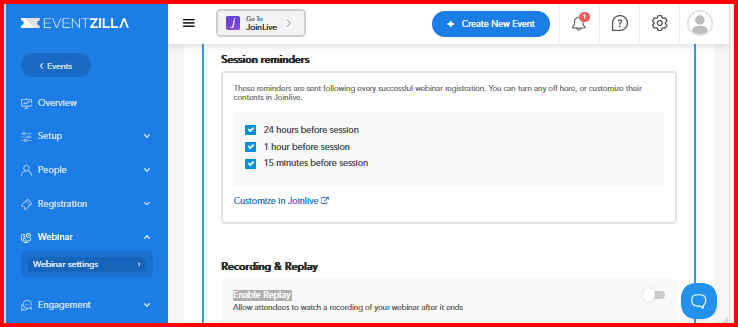
Session Reminders
Provides a standard reminder emails for registered attendees.
The available reminders include:
- 24 hours before the session
- 1 hour before the session
- 15 minutes before the session
You can turn individual reminders on or off from the Eventzilla webinar settings.
For additional customization, including editing the reminder content, use Joinlive.
Use Eventzilla to quickly enable or disable the standard reminders. Use Joinlive when you need more control over the reminder copy and advanced webinar communication.
Recording and Replay
You can enable Replay to allow attendees to watch the webinar recording after the live session ends. This is useful for attendees who missed the live session or want to revisit the content later.
Enable Replay
- Go to the Recording & Replay section in your webinar settings.
- Enable Replay.
- Save your webinar settings.
Once Replay is enabled, the webinar session will be recorded and made available to attendees after the live session has ended, based on the configured replay settings.
Note: The recording is captured during the live session. However, the replay may not be available for immediate streaming as the recording requires a few minutes to be processed and prepared for playback.
How Attendees Access the Replay
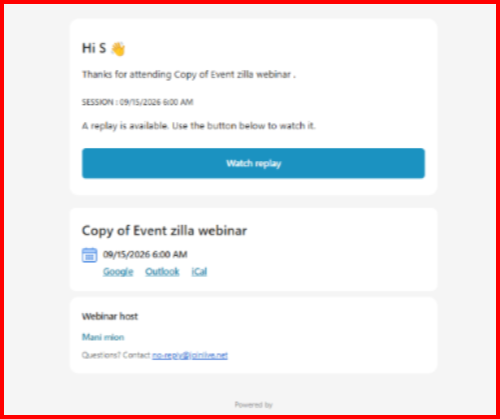
After the live session is completed and the replay is ready, attendees will receive an email with a link to access the webinar recording.
Attendees can click the link in the email to open and watch the replay. The replay link will become accessible once the recording has finished processing
For any additional questions, please write to us at help@eventzilla.net